WAMP Server: this server is a web development platform which helps in creating dynamic web applications.
Here i can tell how to install it on your pc or lap in simple steps:
First of all you need to download WAMP server Here you can Download it.
Choose the type of version which is suitable for your config.
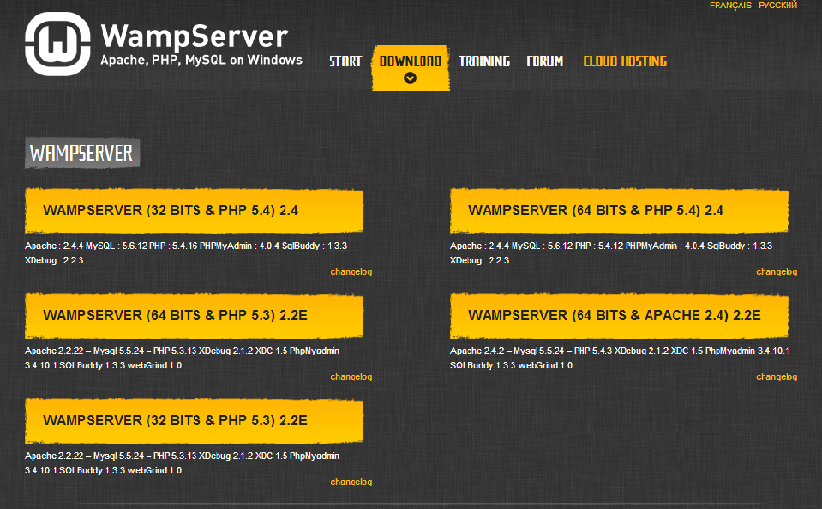 Here the snapshot of Versions of WAMP sever download what ever the version you want.
after select your file, It’ll ask following Popup.
 Don’t worry about this. Just click ‘you can download it directly’ To download it.
After download just click on .exe file to run an installation process.like as follows
 Click on next button to continue.
After that you must and should agree the license of WAMP Server before Installation of WAMP Server.
 After that You should select the Server Location. Most of the server installing into C drive only. Me too installing into C drive. You can browse any other location and click ‘Next’.
 And choose which icons you want like as follows
 After that just click Install button to install it.
 Now just keep calm until installation process done.
 In following window, just leave Default value and Click ‘Next’.
 Now Installation Process is almost done. Tic the Launch and Finish it.
 The installation process is done now
If you want to run it just double click on it.
You’ll get following small icon in TaskBar. First it’s color is Red and change to Orange. At-last it goes to Green color. If green color comes, Your WAMP server running successful.
 Now type the following URL ‘http://localhost/’. to see your WAMP server Home Page
like As follows

Here i can tell how to install it on your pc or lap in simple steps:
First of all you need to download WAMP server Here you can Download it.
Choose the type of version which is suitable for your config.
after select your file, It’ll ask following Popup.
After download just click on .exe file to run an installation process.like as follows
After that you must and should agree the license of WAMP Server before Installation of WAMP Server.
If you want to run it just double click on it.
You’ll get following small icon in TaskBar. First it’s color is Red and change to Orange. At-last it goes to Green color. If green color comes, Your WAMP server running successful.
like As follows
This is the perfect way to install WAMP server if you have any doubt among this feel free to comment......Thank's for Sharing...!!!!!!
0 comments:
Post a Comment